Scribbly Gums Art

This is our art blog because we thought it was about time to put our artwork onto a separate place!! It is where the bush and creativity meet.

There are two other blogs I regularly update which may be of interest to you also ..... Please come and say hi!!

Tattered Inspirations
(Mixed Media Blog)

A Taste of Honey
(ScrapBooking and Info Blog)

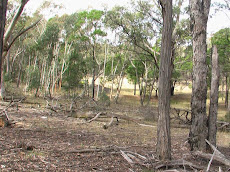
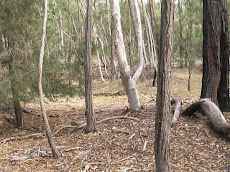
Scribbly Gums Art is named after our property 'Scribbly Gums' which is on the Lower Boro Road between Bungendore and Braidwood.

This blog is an ongoing celebration of those things and
will display Phil and my passions - art, painting, sculpture, mosaics, pottery, photography, mixed media and iron.....

Come and enjoy the art ..... and leave a comment - we would love to hear from you!

Carol & Phil Mead

Saturday, August 30, 2008

A few photos from Scribbly Gums

We popped into Scribbly Gums today to do some planting - we planed 10 medium sized trees - red flowering gums, and braclet murtels. Plus a few kangaroo paws, croweas, telopea (warratah) and a ground covering banksia.


It was great fun and nice to have soil that isn't like a rock to dig and plant into!! So after we did a bit of planting we stood back and admired our work.

My kangaroo paw garden - we have lots (and lots - understatement of the year) of wood lying around - so I thought I would make it a feature ..... the kangaroo paws had overgrown their pots so much I had to chop them into pieces - lets hope they make it!! I cannot remember the colour of their flowers at all - but if they are okay out there then I can see that this could become a definite passion (plus I actually like painting them too)

This is the road that goes up to our property gate. On the left all the way along this road is our place - the road is almost one kilometre long.

We are now deciding where to put the sheds so we can spend time out there..... looking forward to some weekends to really know the place. And we saw a scarlet robin today.... silver eyes, choughs and kookaburras. On the way home we think we saw a wallaroo - I took a photo but all you can see is a shape hopping away - so no photo to decide what it actually was.

The wombats have been very busy again and we are finding more burrows. Looks like a wombat paradise.

Cheers
Carol

Saturday, July 19, 2008

Simple Tulip Step by Step Class

I have created a step by step class for you to create this tulip


You can find the step by step class at the left....... under classes in watercolours step by step
Please leave a comment if you would like more - or found it helpful....have fun

Carol

A few tulips - on a rainy afternoon


What a rainy day - so I painted a few tulips which are so lovely and bright at this time of the year!

These are almost fully blown - I love the looseness of the petals

The centres are so great - I really enjoyed working on this new paper
300gsm rough - it 'blooms' well

Have a great day

Love Carol

Saturday, July 5, 2008

A few paintings....at last !!

Well It has been a while since I updated the site as I have been a bit inundated at work! We have gained new funding and I guess I didn't expect that they would all be approved but they were.....so ..... I am run off my feet!

Anyway enough of that here are some new paintings from our trip to Tilba and a few I have done in the last few days..... Please enjoy


This would have to be my favuorite painting for some time. This coastal bansia was growing near Mystery Bay looking out to see and although the flower was great - I really loved this banskia pod. It has such character. Not only that but it is painted on much smaller paper than usual - A5 size instead of A4 or A3. It was tricky to execute but I love the result.


I am pretty desperate to find flowers in my garden at the moment but this little Happy Wanderer (Hardenbergia) is now putting out its buds even though most other plants are sleeping as it is so cold. The purple is so vivid when it is out properly - but here we are only lucky enough to have buds.


The camilias in the winter garden are a bit weedy due to the drought and probably lack of food.....I took pity on them today and gave them a good dose of moo poo and water so hopefully they will feel a lot better soon. Phil also popped on wetting agent because the drought has made the garden water repellant - hopefully it will rain this week - we need lots!!

This little pink flowering gum is struggling in the front garden with the drought, but low down are a few new flowers ..... this is a bit more subtle in colours than the real colours of the flowers and leaves but I like the quiet feel to this painting.

A few flowers growing in my garden - everything is a bit straggly at the moment. But those jonquils give a real splash of much needed colour to the beds. I am not really a fan of yellow in my paintings as it does tend to look dirty when you shade it - but this has worked quite well I think.


This flowering gum was valiantly putting forth a few early flowers - it usually is covered in blossoms in October. There has been a lot of rain in Tilba over the last couple of months so everything was looking lush and green for our weekend away.


Finally the last painting from Tilba - it is really such a lovely spot.

Thanks for letting me share my paintings with you......

Lots of love
Carol

Saturday, May 31, 2008

Pottery - what I do in my spare time!


Hi everyone

After promising a few photos of my pottery I finaly got around to snapping some photos today!!! Of course if I took photos of every pot and plate I have made it would be so boring so I have tried to keep it to techniques and a few styles.....

Japanese papers - I know this looks as though I sat with a paint brush forever detailing in blue or black - but actually this is Japanese transfer paper. What you do is apply it to a pot which is ready to bisque fire, so it is raw. The papers come in A3 sheets and you apply the paper but dampening the pot with a sponge then section by section placing the paper onto the pot with the damp sponge. It does take a fair bit of practice!


From trial and error though - you must remove the paper once it is dry because other wise it makes a mess of other pots in the kiln - and no one is happy! The print stays on the pot. Also, with a bisque firing people do tend to place pots inside each other - this can't happen with these pots - as we found out - what a mess!!! Anyway we have all learnt the hard way and now have much more success.


I rather like the pot above as I didn't glaze the inside after the bisque firing, just the inside so it can be used to hold liquid and it won't stain.


Pots which have been glazed with a clear glaze over the top of the pattern.....

These are some bonsai pots I have made using the same tenique with the Japanese papers, but they are on Walkers 5A Dark which is a clay that I really love at the moment. Probably because it is so silky to throw and comes out a wonderful biscuit colour. Unfortunately not all glazes that I use come out true on this clay but I have found the ones that look great on it and now use them......


Phil is the Bonsai King of this family, me I just make the pots and collect the little figures - like this great boat with the man finishing out the front and his wife doing the washing out the back. This boat cost me $20 and for the work in it I was happy to pay that amount it was so worth it!!!!


Complete with bonsai - is this case a fig tree and a laughing budda

This is a set of bowls I made for my brother for Christmas. They nest inside each other and get lots of use. We have several here as well and cook with them all the time. Jess and Matt also use theirs and the nice thing about pottery in comparison to ceramics is it takes a lot more wear and tear so they last longer. I love this glaze - as the iron in the clay reacts with the glaze the red can be seen through the creamy base of the glaze - it is one of my favourite glazes to use on Walkers 5A Dark clay.

For something completely different - here is a latte set. The cup and saucer are really rustic and don't have handles on the cups. I love the way these work and comments about them are really positive........


A view from above. These would also be really cool as a herbal tea set as well. I am definitely thinking that I might make more of these for friends at Xmas. I love the fern effect, but will think about some other designs as well - although I think the imprinted fern goes really well with the clay. Walkers copper rust is the glaze (but I am not too keen on the colour - I am still trying to find a green that works well on this clay).

Thanks for looking everyone,
Have a wonderful day wherever you are
Carol

Friday, May 30, 2008

Porcelain Vessels


I love throwing with different clays and one of my favourite clays is porcelain. In this case I have gone all out and thrown in Southern Ice which is one of hte most expensive clays at around $35 a bag.

With porcelain you have ot be so fussy to cleanliness as it tends to pick up all sorts of grit and I find it drys pretty quickly so you need to watch it and ensure that you turn it at just the right time.


But even with its issues it is like butter to through, I love the way it fires so white and pure and leach green glaze (which I have used here) seems to be made for it!


As you can see by these pots they look carved........ what I have done is used shellack and metholated spirits to paint on a design on a raw pot before a bisque firing, and then when it is dried on the pot wiped away the clay from around the design with a damp/dry sponge.

The tricks of the technique seem to be
  • Dont use an overly damp sponge
  • Make sure the shellack and metho mix is thick enough (or use two coats)

When the piece is fired the shellack burns off and leaves the raised clay underneath. In the rose pot the effect with a candle inside is stunning.

Thanks for looking - I hope you have enjoyed it
Love
Carol

Thursday, May 29, 2008

Targine


Here is something that I loved making and with practive I am definitely going to produce more of these. A targine is an African cooking pot with a high lid and a shallow base.

I founf a picture of one with a domed lid which I liked and it is much easier to through than a cone shaped lid. I used Shiga red glaze and then a pale green glaze dribbled over the top, this broke the glaze into interesting brown and blue patterns.

I also made a rice vessel to go with the targine - we will be putting it through its paces this week and cooking an African vegetable stew in it and I will let you know how it goes......

Thanks for looking
Carol